
Table of Contents
Contributing to Plugins on GitHub
You've found a great plugin that on the Plugin Store and it's open sourced (so it has a link go GitHub on the details page). The only problem is that it has a bug or you have a simple feature you'd like to add. Fortunately, since it's on Github, you can contribute changes to the plugin so others can benefit from it as well.
This article is a simple how-to on getting started with GitHub, specifically as it relates to contributing to existing plugins (check the GitHub Setup for Plugins wiki article if you want to add your plugin to GitHub). While the flow presented here isn't the only way to get started (there are a wide variety of options for using Git and GitHub), it is one approach that we know works.
Step 1: GitHub Account and App
The first step is to create your GitHub account on the GitHub website if you don't already have one.
Once you've done this, download the GitHub Desktop application. While this isn't strictly required to use GitHub, I find it much easier than learning command-line tools - so the rest of this how-to will assume that you have it.
Open the GitHub Desktop app and log in using your newly created GitHub credentials.
Step 2: Fork the Plugin Repository into Your Account
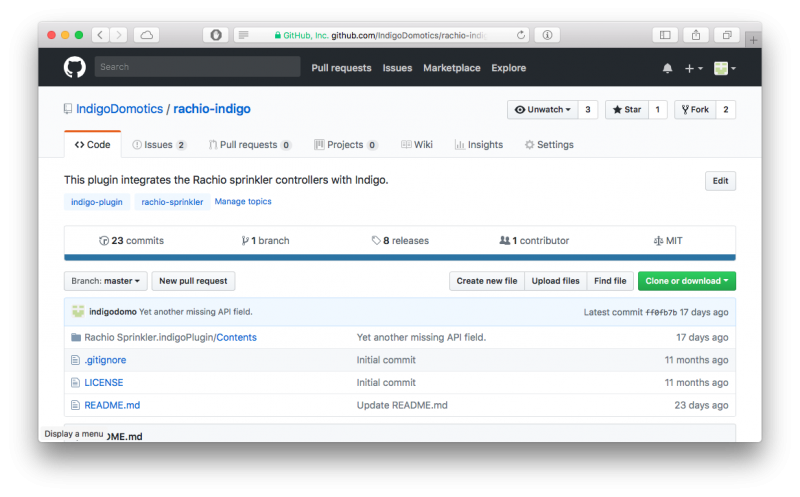
Once logged in to Github, find the repository you're interested in and fork it into your account. You do that by clicking the Fork button (as of this writing it was in the upper right corner). For instance, if you wanted to fork the Rachio Sprinkler plugin, you'd see this:
and you'd click the Fork button. After a brief in progress page, you should see something similar this:
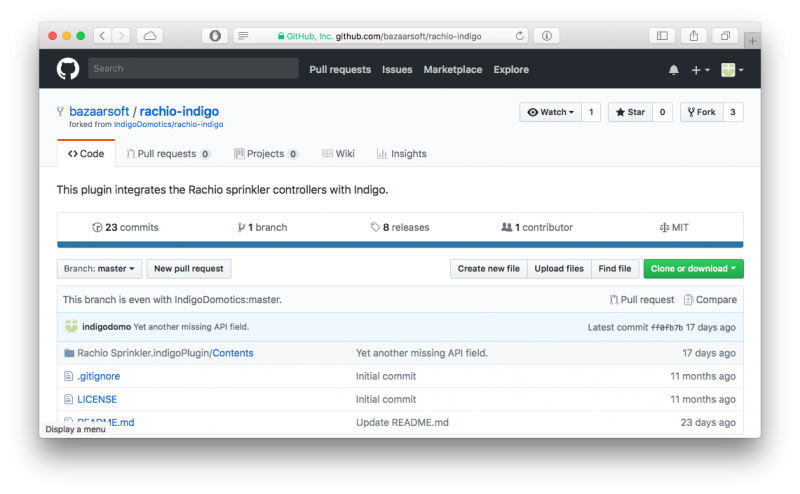
This is showing that you now have a fork, or your own copy, of the repository. You can make changes to this copy all you want and it won't effect the original repository.
If you've previously forked the repo, then make sure that it's up to date before making your changes.
Step 2: Make Your Changes
You can edit the files in your fork directly by navigating to the file and clicking the pencil (edit) icon. You likely won't want to do that with source code since you'll want to test your change. However, for text files (like the README.md file or any other text file that doesn't require testing) that's an acceptable way of making a change.
To fix bugs or add features, you'll most likely want to perform the edit/test/run cycle on your own Mac. To do that, just click the Clone or download button above the repo file list. Assuming you downloaded the GitHub client in Step 1, you'll click the Open in Desktop button on the popup. This will open the GitHub client and download the source to it. GitHub Desktop will ask you where you want the local copy to go - this is the folder you will go to to edit the plugin files. This is what you'll see in GitHub Desktop when it's done:
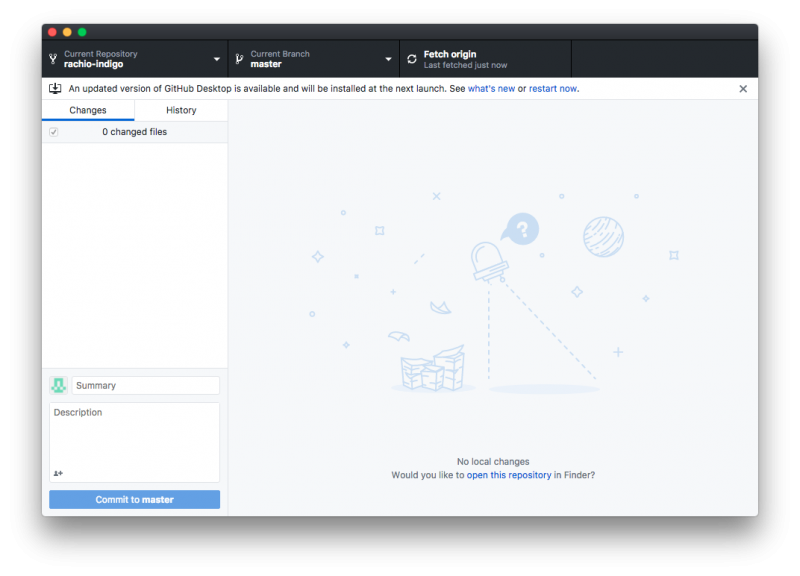
So, you don't have any outstanding changes to the repo, so the UI is pretty empty. Click the open this repository link in the lower part of the window to open the folder in the Finder.
At this point, you're ready to edit and test your changes. We'll leave that process up to you since it'll be heavily dependent on how you do your development. Once you're happy with your changes, when you switch back to GitHub Desktop it'll show something like this:
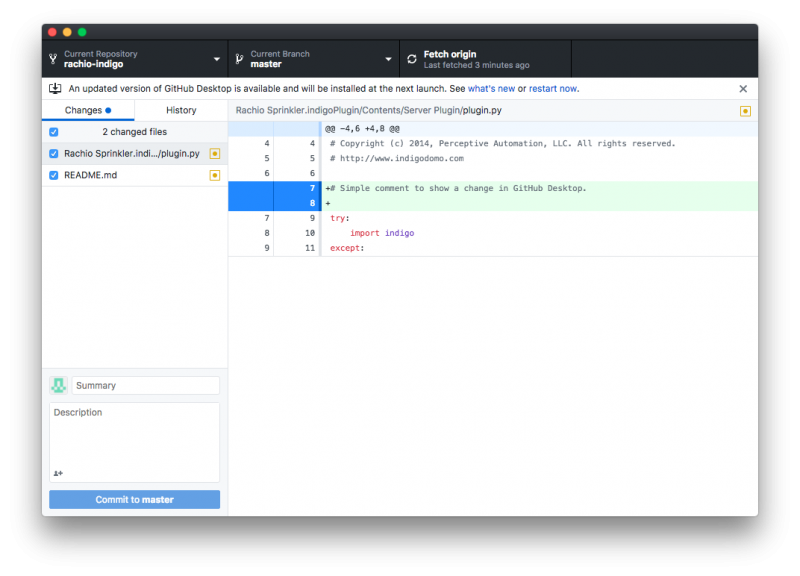
Notice the two changes listed in the left column: for you, this will list any files that you've made changes to and the area on the right side will show what the selected changes are. When you're ready to check the changes in (to your local Git repo), enter a summary and description of the changes and click the Commit to master button in the lower left side. After that, your changes have been made in your local copy of the repository and you'll see something like this:
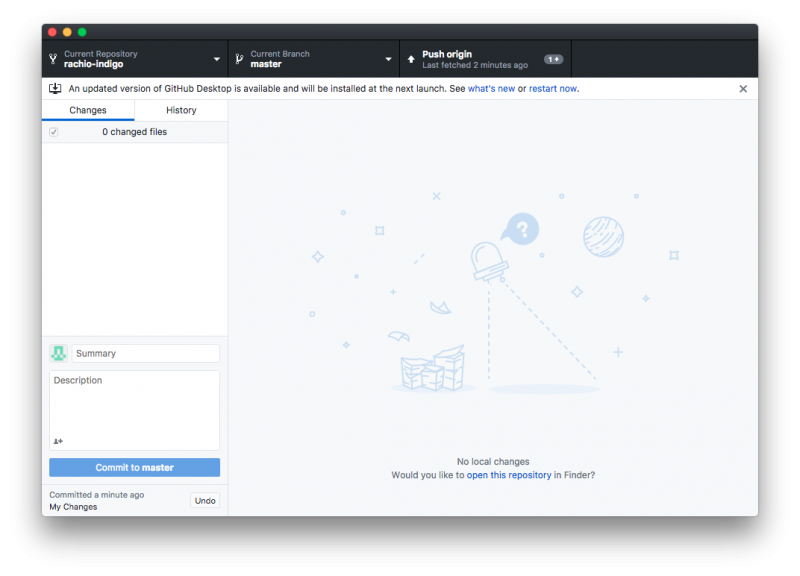
Notice that it no longer shows outstanding changes - because there aren't any. You've checked them in (if you switch to History you'll see them there). What you may notice is that the upper right has changed to a Push origin button. This will push your changes up to the forked repository in your GitHub account. Click that button (it'll switch back to Fetch origin when it's finished). If you switch back to the repo in your GitHub account, you should see:
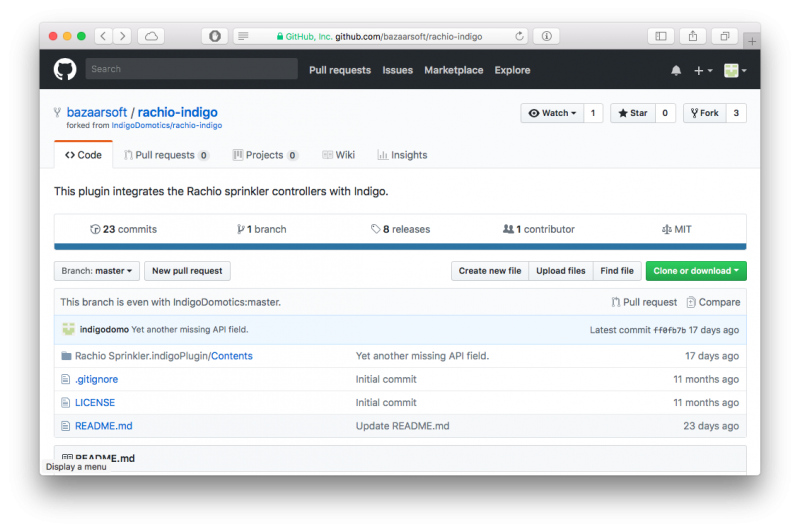
You'll notice that the top line above the file list will show the commit that you made in GitHub Desktop.
Step 3: Issue Pull Request
The final step is to tell the owner of the repository that you have some changes you'd like to add to the main plugin repository. Click the New pull request button above the file list. You'll see this:
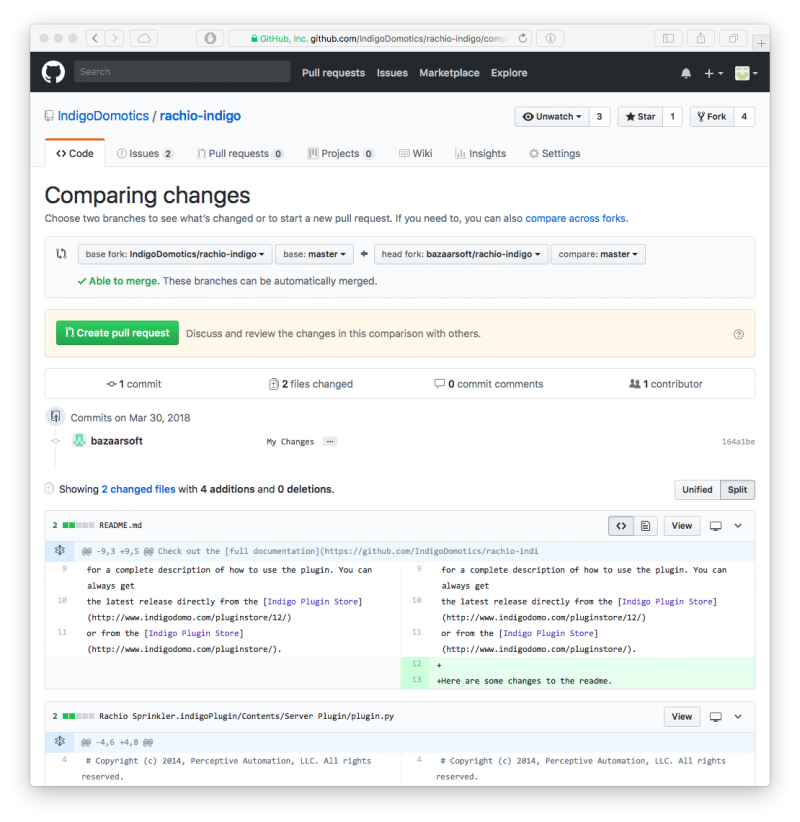
Tons of stuff on that page, including all the changes made to all the files. Click the Create pull request button, fill out the form with a summary and details of your change(s). Click the Create pull request below the form. That will submit the pull request to the owner of the original plugin repo and they'll be able to accept the changes or get back to you with comments.
That's it! Follow this process to become a contributor to all the open source plugins that are available for Indigo. I'm sure the original developer of the plugin will welcome changes.